
- S13E30
- June 17, 2020
Is This The Best SBC and Case for 2020?
The new Raspberry Pi 4 with 8 GB RAM is up there with a budget PC, so we set out to make it look like a proper desktop. The Argon ONE case seemed like a great fit, and proves its worth as Robbie assembles the kit and installs the needed software for the Argon ONE's power button and fan controller. Lots of Linux under-the-hood as we dig into the code that makes the Argon ONE tick.
Watch Now
- S13E29
- June 10, 2020
The Spotlight's On Robbie
Linux Spotlight features a wide variety of guests from the Linux community, and this week, Robbie was that guest. He doesn't often get to be on this side of the questions, so this is a great chance to get to know the man behind Category5 Technology TV. In this short preview of the full interview, Robbie talks about his first computer, the Linux distro that helped him make the switch from Windows, and the distro he uses now.
Watch Now
- S13E29
- June 10, 2020
Installing Pinebook Pro Operating System on a microSD Card
The Pinebook Pro can boot and operate from an operating system installed on a microSD card. This means you can quickly and easily swap your "hard drive" in and out depending on what you need, or who is using the Pinebook Pro. It also means you can easily test a variety of distros without having to reinstall your main operating system. Robbie will show us how to obtain an operating system, and how to use (and say?) balenaEtcher to make a bootable microSD card for your Pinebook Pro laptop.
Watch Now
- S13E29
- June 10, 2020
Getting Started with GitHub Project Management
GitHub is an online space for Git repositories. It provides a browser-based interface to supplement the productivity Git brings to projects. You can think of Git as a time machine for your code, a way to collaborate with other developers, or just a handy-dandy way to ensure your code is synced to all your devices. And what's best? It's free. Robbie will show us the very basics: How to create a repository, how to clone it to your local machine and make changes, and how to push those changes back to the server.
Watch Now
- S13E28
- June 3, 2020
Pinebook Pro Issues: How To Fix Boot and WiFi (June 2020)
The COVID-19 pandemic has meant PINE64 staff aren't allowed at the very factories that are manufacturing their products. QA/QC are not possible, and it's down to the factory to provide a working product. Regrettably with the latest run (May/June 2020) of Pinebook Pro notebook computers, there are two notable issues: WiFi not working, and an inability to boot. Luckily, both of these issues are an easy fix. So we'll show you how to correct them quickly, and get you up and running with your shiny new Pinebook Pro.
Watch Now
- S13E28
- June 3, 2020
(5) MikroTik Viewer Q&A
In the first Viewer Q&A of our MikroTik video series, Robbie receives some kind words from drreality1 and TCC, as well as an intriguing request from RockawayCCW that leads Robbie to an excellent idea on how parents can restrict the Internet access of their children based on time of day. He also has a question for you, so comment below: Should we use WebFig or WinBox, and why?
Watch Now
- S13E28
- June 3, 2020
OverType Brings Back the Nostalgia of an Old-School Typewriter
OverType is a browser-based typewriter simulator. It faithfully recreates the experience of typing with an old-school typewriter: From overtyping, wobbly and unevenly inked characters, only being able to press one key at a time, and frustration are all accurately simulated. To save your text, simply use your browser's Print To File feature.
Watch Now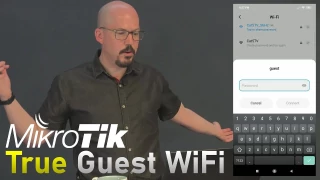
- S13E27
- May 27, 2020
(4) True Guest WiFi with MikroTik Routers
When customers, friends, or guests arrive, they often ask for the WiFi password. Thing is, by providing it to them, you make your network susceptible to ransomware attack if their device is infected, plus you grant them limitless access to your network resources, such as private shared files, printers, and IoT devices such as your smart surveillance, thermostat or even smart door locks. Let's set up a separate WiFi network--with no additional hardware--using MikroTik. It will be isolated from our main network so users who are connected to it will be unable to access anything on our private network.
Watch Now
- S13E26
- May 20, 2020
(3) NAT Router Rules (Port Forwarding) in MikroTik RouterOS
The next step in our MikroTik series will see us routing NAT firewall rules to allow outside (Internet) users to access ports 80 and 443 on our internal web server. We'll create the required NAT (Network Address Translation) rules, and configure a Firewall Rule for each port to direct traffic through our Internet connection to the in-house server.
Watch Now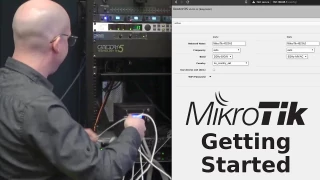
- S13E25
- May 13, 2020
(2) Initial Setup of a MikroTik Router
Welcome to our series on using a MikroTik router! Through the series, we'll learn some exciting and sophisticated network configurations we can create with our affordable MikroTik router. But we've got to start with the basics: We'll begin by bridging our ISP's modem (cable Internet) and connecting to our MikroTik router (default 192.168.88.1) in the web browser. We'll change the IP address (to 10.0.0.1) and the DHCP pool to 10.0.0.100-10.0.0.254, establish Internet connectivity to our network and setup basic 2GHz and 5GHz WiFi connections. We'll also glance around the RouterOS WebFig interface quickly, and talk about the optional MikroTik configuration client, WinBox.
Watch Now